
Purpose and Scope
The acrylic panel is used to verify the panel’s outside profile, equipment locations, mounting holes, and structural clearances before the final panel is manufactured. Complete the test fit carefully and document every required change. The accuracy of the finished panel depends on the information provided during this process.
Important: The acrylic template is intended for test-fitting only. It is not an approved flight component. All aircraft work should be performed by appropriately qualified personnel using applicable maintenance instructions and approved data.
Before You Begin
Before installing the acrylic template:
- Remove the protective paper backing from both sides of the acrylic.
- Completely remove all equipment that mounts to or passes through the panel.
- Remove any hardware, brackets, or other components that would prevent the acrylic from being positioned correctly.
- Confirm that electrical power is disconnected as required.
- Keep the work area free of tools, hardware, and debris that could scratch or damage the acrylic.
Attempting to position the acrylic around installed equipment may damage the template and make it difficult to evaluate the panel accurately.
1. Install the Acrylic Template
Carefully position the acrylic template in the aircraft. Do not force it into place.
Once positioned, check the template for:
- Proper alignment with the surrounding structure
- Interference along the outside profile
- Mounting-hole alignment
- Clearance around structural components
- Equipment opening locations
- Adequate clearance behind the panel
Inspect the entire perimeter before making any modifications.
2. Correct Outside-Profile Interference
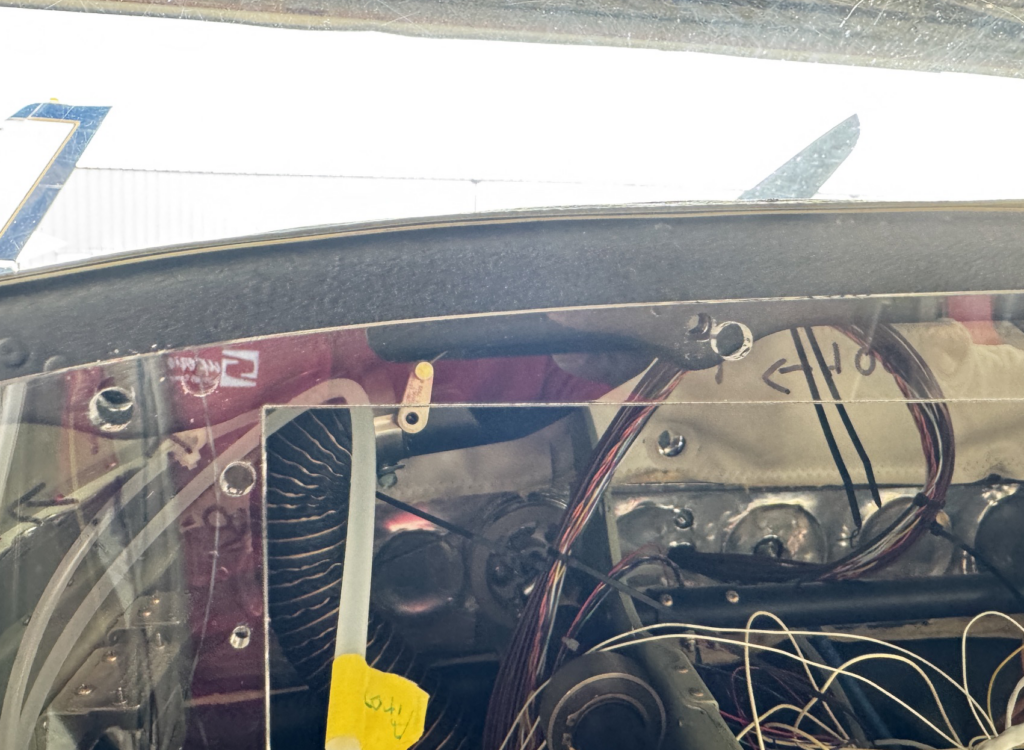
If the outside profile of the acrylic contacts or interferes with the aircraft structure, carefully remove material from the affected area.
A Dremel, router, or another tool designed for cutting plastic may be used. Remove material in small increments and reinstall the template frequently until the desired fit is achieved.
Use care when cutting acrylic:
- Support the template while cutting.
- Avoid excessive pressure or heat.
- Do not force the cutting tool.
- Smooth any sharp or rough edges.
- Wear appropriate eye and respiratory protection.
3. Indicate Where Material Must Be Added
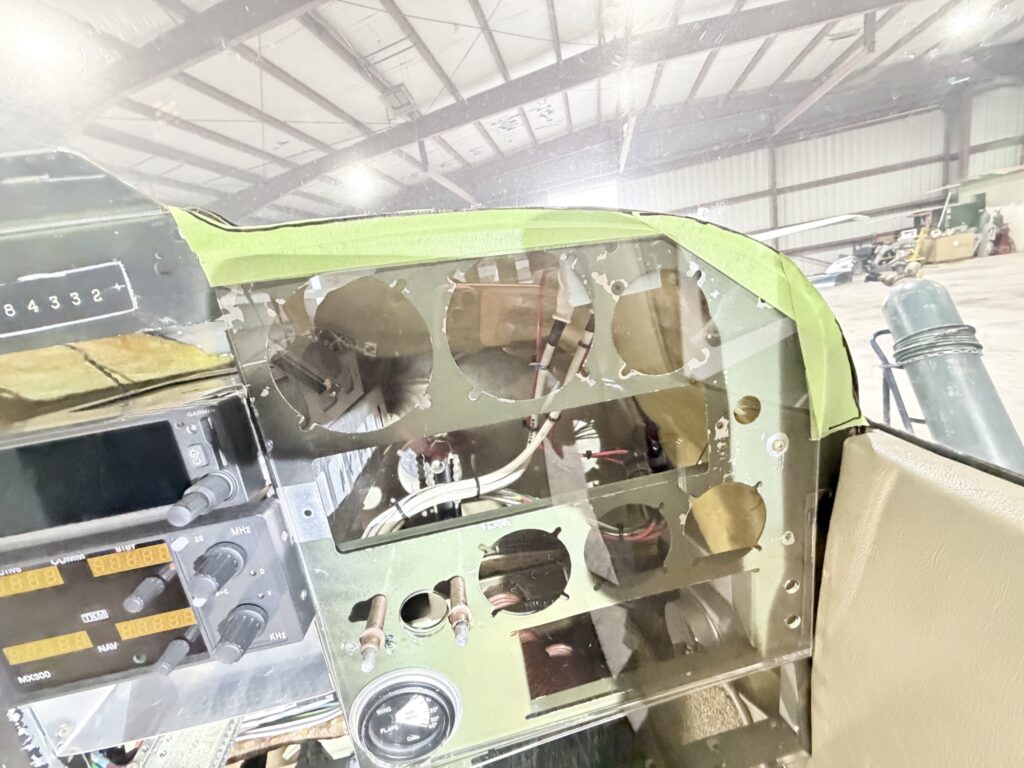
If the final panel profile needs to extend beyond the edge of the acrylic, use tape to create the required profile:
- Apply tape securely to both sides of the acrylic in the area where material must be added.
- Extend the tape beyond the existing acrylic edge.
- Draw the desired finished profile on the tape.
- Use scissors to trim the tape along the profile line.
- Reinstall the template and confirm that the new taped profile fits correctly.
Make sure the tape remains firmly attached and accurately represents the desired finished edge.
4. Mark Equipment Relocations
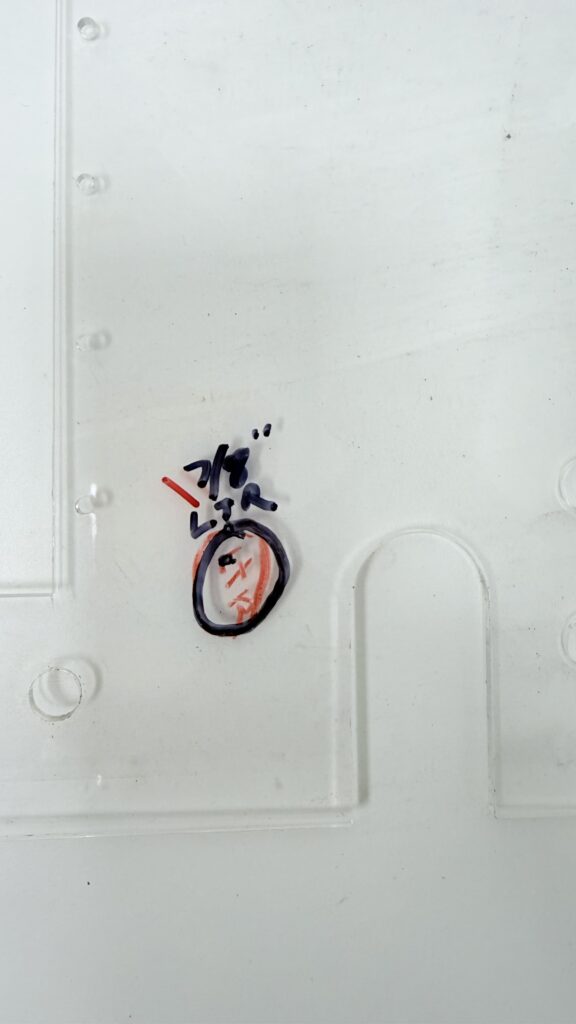
If an equipment opening needs to be relocated, use a fine-tip permanent marker to carefully draw the correct location directly on the acrylic.
Clearly identify:
- The new equipment opening
- The required orientation
- Any associated mounting holes
- The location that should no longer be used
Mounting holes may be drawn on the acrylic or carefully drilled into the template. Verify all measurements and alignment before drilling.
Keep markings thin, precise, and easy for the Superior Aircraft Components design team to interpret.
5. Test-Fit Equipment Individually
Each piece of equipment should be test-fitted individually.
For every item, verify:
- The equipment fits through its opening.
- The mounting holes align correctly.
- The equipment does not interfere with the aircraft structure.
- There is sufficient clearance behind the panel.
- Connectors, wiring, controls, and installation hardware remain accessible.
- The equipment is properly aligned and oriented.
Remove each item before test-fitting the next one.
Do not install all equipment into the acrylic template at the same time. The combined weight and stress may crack or otherwise damage the acrylic.
6. Complete a Final Fit Check
After all trimming, marking, and equipment checks have been completed, reinstall the acrylic template and inspect the entire panel again.
Confirm that:
- The outside profile fits properly.
- All structural interference has been identified.
- Added profile areas are clearly represented with tape.
- Equipment relocations are clearly marked.
- Mounting holes are correctly located.
- Each piece of equipment has been test-fitted individually.
- All requested changes are easy to understand.
Do not remove or alter the final markings after completing the test fit.
7. Submit the Changes to Superior Aircraft Components
For complex profile or equipment-location changes, return the modified acrylic template to Superior Aircraft Components so our team can digitize the revisions.
Less-complex changes may be submitted by email. Include:
- Your name and project information
- Aircraft model and tail number
- A written description of each requested change
- Clear photographs of the marked acrylic or on the drawing provided by Superior Aircraft Components.
- Measurements when applicable
Superior Aircraft Components will review the submitted information and update the panel design accordingly.


